Start by prepping the lids with a lightweight primer to create a smooth base for color. Use soft, controlled strokes and layer pigments gradually to avoid patchy buildup. Focus on where shades meet and blend outward with a fluffy brush to erase harsh edges. Choose quality brushes and the right amount of product for a polished, seamless eye look.
Choose the Right Eyeshadow Brush
When you’re choosing the right eyeshadow brush, start with a soft, fluffy blending brush because it spreads color smoothly and helps you avoid harsh lines. You’ll feel more confident once your brush selection matches your goal.
For quick washes of color, choose larger blending brush sizes that cover the lid evenly. Then, use smaller brushes for the crease and outer corner, where you need more control. Should you want deeper color, reach for a smaller brush again, since it places shadow exactly where you want it.
A clean, soft brush also helps you blur edges without making the shades muddy. So, keep a few sizes nearby, and you’ll build a look that feels polished, easy, and truly yours.
Prep Your Lids for Eyeshadow Blending
Start with a clean lid, because leftover oil or old shadow can make your blend patchy fast.
Then apply eye primer to give your color something to hold onto and help it stay put longer.
Finish using a light base color so your shadows glide on smoothly and blend with less effort.
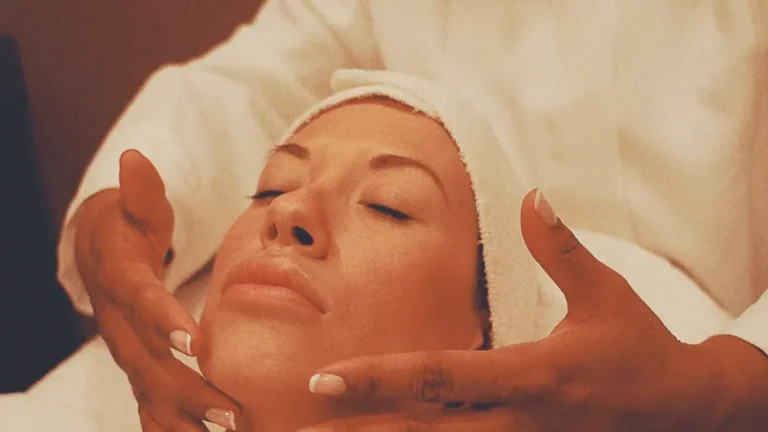
Clean Lid Surface
A clean lid gives your eyeshadow a smooth, even base, and that little bit of prep can save you a lot of frustration later.
You’ll want to start with gentle double cleansing to lift away sunscreen, makeup, and daily grime without rubbing your skin raw. Then use an oil free lid wash so any leftover shine doesn’t fight your shadow. Pat the area dry with a soft towel, and don’t skip the lash line, where residue likes to hide. Once your lids feel fresh, your colors sit better and blend more easily, so you can focus on creating that polished look everyone loves. Whenever your eyes run a little oily, give them a quick once-over before you begin. It’s a small step, but it helps you feel ready and included.
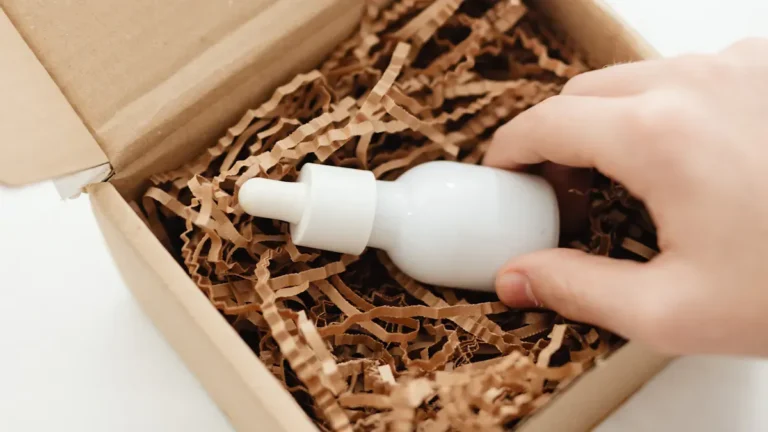
Apply Eye Primer
Primer acts like the quiet hero in your makeup routine, because it gives your lids a smooth base that helps eyeshadow grab on and stay put. You’re not just preparing skin; you’re joining the people who want color that looks polished together. Choose a primer texture that feels light, not sticky, so it won’t fight your brush. A primer formula with a soft grip helps powder blend more evenly and keeps the finish steady.
| Choice | Feel | Benefit |
|---|---|---|
| Thin | Silky | Easy to spread |
| Creamy | Smooth | Grips shadow well |
| Matte | Dry-touch | Cuts shine |
| Tinted | Even | Cancels slight discoloration |
| Clear | Bare | Works with any shade |
Apply a tiny amount, then tap it across your lid and let it settle before you reach for shadow.
Set Base Color
With your lid already primed, you can lay down a base color that makes the rest of your eyeshadow look smoother and easier to shape. Pick a neutral base close to your skin tone, then sweep it from lash line to brow bone with a fluffy brush.
This step evens out redness and gives your next shades better color payoff. When you want a softer look, use a thin layer so the color can still breathe through. When you want more depth, build a second light coat where you need it most.
Keep your strokes gentle and even, because that helps every shade blend like it belongs there. Soon, you’ll have a clean canvas that feels polished, calm, and ready for the fun part.
Build Eyeshadow Color in Thin Layers
You want to start with a sheer initial layer so the color can build without crowding your lid.
Then add thin washes of shadow one at a time, which gives you soft color depth and keeps the blend smooth.
This slow build helps you avoid a muddy finish and keeps each shade clear and polished.
Sheer First Layer
Whenever you want your eyeshadow to look soft and polished, start with a sheer initial layer so the color can build slowly instead of landing all at once. You’ll feel more in control, and that calm start helps your look stay smooth. Choose a fluffy brush, tap off extra shadow, and sweep on a sheer wash layering across the lid.
Use light pressure, then keep moving in small circles or gentle windshield wiper motions. This gives you barely there tint buildup without harsh edges. Whenever one spot looks uneven, soften it right away with your clean brush.
You’re not chasing drama here, just a friendly base that welcomes the next steps. That little bit of patience makes your blend feel easy, polished, and naturally yours.
Gradual Color Depth
Now that your initial layer looks soft and even, it’s time to build color in thin, steady layers so the eye shape stays smooth instead of heavy. You’ll feel more in control as you add just a little at a time, because color depth progression grows naturally. Use a fluffy brush, tap off extra product, and press the next shade where you want more lift. Then blend softly so each step adds layered shade dimension without crowding the lid.
- Sweep a midtone through the crease.
- Deepen the outer corner with small strokes.
- Softly connect the lid and crease.
- Check your blend in daylight.
With each pass, you create a look that feels polished, welcoming, and easy to wear with your favorite people.
Prevent Muddy Finish
To keep your eyeshadow from turning muddy, build the color in thin layers and let each shade do its job before the next one goes on.
You’ll protect color separation and keep shadow balance whenever you tap off extra product, then press on a little at a time. Start with your lightest transition shade, then deepen the crease with a darker tone using gentle windshield-wiper strokes. After that, add the lid color and blend only the edges where the shades meet. A fluffy brush helps soften lines without mixing everything into one gray blur. Should the look start to lose shape, pause and rebuff with a clean brush. That small reset keeps your colors clear, polished, and friendly to your eyes.
Apply the Transition Shade First
Begin with the blend shade, because it sets the whole eye look up for success.
You place this crease buffer shade a little above the deeper color, and it helps your colors feel like they belong together. Use a soft brush and keep the edges light. That initial layer acts like a seamless blend layer, so your lid shade won’t jump out at the brow bone.
- Consider a soft cloud in the crease.
- Visualize a warm scarf between two bold colors.
- See a gentle sunset fading across your lid.
- Envision your look as one team, not separate pieces.
When you start here, the rest of your shadow blends with less effort and more calm. You don’t have to fight harsh lines, and that can feel pretty great on busy mornings.
Blend With Small Circular Motions
With your shadow in place, small circular motions help soften the last sharp bits and make everything look more lived in. You can keep your brush light and let the tip skim the outer corner initially, where color often feels strongest.
Then move in tiny loops to blur the edge without dragging shadow too far. This small circular blending works best once you stay close to the shape you built, because it keeps the look polished and still personal. Whether one spot looks heavier, pause and circle there a little longer.
That gentle pressure helps with outer corner diffusion and gives your lid a smoother fade. You don’t need to rush; a few calm passes can make your eye look finished, friendly, and easy to wear.
Soften Harsh Edges With a Clean Brush
A clean brush can smooth out those sharp lines and make your eyeshadow look softer right away.
You just need to buff gently along the edge, using light, small sweeps so the color fades instead of sitting in a hard line.
This step works like a quiet reset, and it helps your blend look polished without muddying the shades you already built.
Clean Brush Buffing
After you’ve placed your shadows, a clean blending brush becomes your best fix for any sharp line that still feels too bold. You don’t need to add more color; you just need to buff with the soft, empty bristles so the edge melts into the rest of your look.
This little step helps you feel polished, like your makeup belongs on you. Keep your brush ready with simple brush maintenance tips, and use powder residue removal so old color doesn’t sneak back in.
- Sweep the brush where two shades meet.
- Use light, short motions.
- Turn the brush often for fresh bristles.
- Pause and check the blend in natural light.
When you do this, your eyeshadow looks smoother, friendlier, and easier to wear all day.
Edge Softening Method
While an eyeshadow edge looks too sharp, you don’t need to start over, and you definitely don’t need to pile on more color. Instead, take a clean, fluffy brush and lightly sweep along the line.
Use small, gentle circles, then short windshield wiper motions to break up the edge. This edge diffusion keeps your shades in place while softening the border.
If the color still feels harsh, tilt the brush and tap the outer rim with barely any pressure. You’ll build a feathered perimeter that looks smooth, lived-in, and polished.
Keep the brush clean, because old pigment can muddy the blend fast. With this simple step, you make your look feel friendlier and more balanced, like it was always meant to belong on you.
Keep Dark Shades on the Outer Corner
Keeping dark shades on the outer corner gives your eye look shape, depth, and a soft lift. You want dark shade placement to stay there because it frames your eyes without swallowing the whole lid. For outer corner emphasis, place the color where the eye naturally turns outward, then blend inward just enough to soften the edge. This keeps your look polished and friendly, like you meant it that way all along.
- Consider of a small shadow hugging the outer corner.
- Visualize the color fading like a sunset into the crease.
- Envision a lifted edge that makes your eyes feel open.
- See the darkest tone sitting near the lash line, not drifting across the lid.
With this balance, you’ll look put together and right at home.
Layer Matte and Shimmer Finishes
Matte and shimmer work best together because each one does a different job, and your eyes get the payoff. You create matte shimmer contrast by placing a soft matte in the crease and a shimmer on the lid. That mix adds depth without making the look busy.
Next, keep your finish texture balance steady by choosing one finish to lead and the other to support. A satin shimmer can brighten the center, while a velvety matte grounds the shape. Then, blend the edges where they meet so the shift feels smooth and friendly, like your shadows are already on the same team.
If you want a little extra polish, tap shimmer only where light hits most. This keeps your look fresh, balanced, and easy to wear.
Fix Patchy Eyeshadow Fast
A patchy eyeshadow look can feel frustrating, but you can fix it fast without starting over. First, use a clean fluffy brush for a quick patch repair, then tap off any extra color. If one spot looks bare, add a little shadow there and soften the edge right away. Next, use small, gentle circles for spot reblending so the color melts into the rest.
- Envision a soft brush dusting over a dry corner.
- Envision a tiny dab filling a faded crease.
- Envision a smooth sweep easing harsh lines.
- Envision your lid looking even again, like you belong in the glow.
If the patch still shows, add a touch more shadow and blend lightly. Keep your pressure soft, and you’ll save the look fast without turning it messy.
Practice Eyeshadow Blending on One Eye First
If you’ve just fixed a patchy spot, the best next step is to practice on one eye initially so you can build your blend with less stress.
Your one eye practice routine gives you room to check brush pressure, shade order, and soft windshield wiper motions without rushing. Start with the darker shade in the outer crease, then add the blending shade and keep blending until the edge looks smooth.
After that, compare the initial eye second eye symmetry, but don’t copy every tiny detail right away. Instead, match the shape, depth, and softness. This lets you learn what works on your face while staying in control.
And if one side looks a little stronger, that’s fine. You’re building skill, not auditioning for a perfection contest.