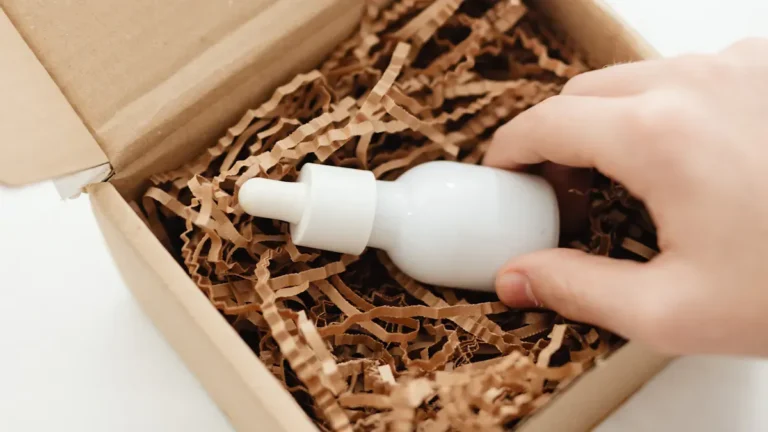
You can even skin tone without foundation using smart prep and lightweight products. Start with gentle exfoliation and hydration to create a smooth base. Use tinted balms, color correctors, and spot concealers in thin layers that match your natural hue. Finish with a translucent powder or mist to set without heaviness.
Prep Skin for Makeup Without Foundation
Before you reach for any makeup, give your skin a real head start. Start with gentle cleansing to wash away oil, sweat, and yesterday’s buildup.
Then follow your skincare prep with a moisturizer that sinks in well, so your face feels smooth, not sticky. After that, keep your sunscreen routine simple but steady: choose a broad-spectrum SPF 50, then spread it evenly across your face and neck.
This step guards your skin and adds a soft, hydrated finish that helps makeup sit better. Should your under-eyes feel dry, tap on a little eye cream too.
Whenever your skin feels cared for, you don’t have to hide behind heavy coverage. You can show up fresh, calm, and ready with the rest of your people.
Choose a Lightweight Skin Tint
A lightweight skin tint can give you just enough coverage to even out your skin without hiding it, which keeps your makeup looking fresh and real.
You’ll want a sheer formula that smooths redness and softens small spots while still letting your skin breathe.
The best match feels like nothing on your face but still makes you look a little more polished.
Sheer Coverage Basics
Whenever you want makeup without foundation, a lightweight skin tint can do a lot of the heavy lifting without feeling like a mask.
You can tap it on with your fingers or a damp sponge, then blend from the center of your face outward.
This keeps your skin looking like skin, with sheer luminosity and natural radiance that still feels like you belong in the room.
Should you want a little more help, add a second thin layer only where redness or uneven tone shows up.
That way, you stay in control and avoid the heavy look that can make makeup feel separate from you.
For the most natural result, choose a formula that spreads easily and lets your features stay soft, fresh, and real.
Natural Finish Match
For a natural finish, pick a lightweight skin tint that melts into your skin instead of sitting on top of it. You want shade matching that follows your undertone, so the color blends cleanly and your face still looks like you. Start with a thin layer on the center of your face, then soften it outward with clean fingers or a damp sponge.
This keeps the coverage sheer and helps redness fade without erasing your features. Whenever one shade feels close but not perfect, mix two for a better match. A good skin tint should move with your skin, not fight it, so you stay comfortable and confident.
That way, your makeup looks easy, fresh, and quietly polished, like you belong exactly where you are.
Choose Shades for Your Undertone
Choosing the right shades for your undertone can make makeup without foundation look polished instead of patchy.
When you do undertone matching, you’re not chasing the “pretty” color on the shelf; you’re choosing what blends with your skin.
Provided your skin leans cool, reach for rose, berry, and blue-based tones.
Provided your skin is warm, peach, apricot, and golden shades usually bring shade harmony.
Neutral undertones can wear both, so you’ve got more room to play.
Begin with blush first, then pick bronzer and lip color that sit in the same family.
That way, your face looks connected, not crowded.
Small changes matter here, and yes, the right shade can feel like finding your people in makeup form.
Color Correct Dark Spots Naturally
Most of the time, dark spots look louder than they are, and you don’t need a full face of foundation to calm them down.
Start with skin that’s clean and moisturized, then choose a peach or orange corrector that matches your depth of color. Tap it only on the spot so you keep natural discoloration balance and avoid a flat finish. Blend the edges with a small brush or fingertip, pressing softly instead of rubbing. If the mark still shows, add a tiny bit more dark spot correction in thin layers.
This keeps your skin looking like you, just more even. A light touch helps you fit in, feel comfortable, and still let your real skin shine through with confidence.
Conceal Only Where You Need It
You don’t need to cover your whole face to look polished, so start with placing concealer only on the spots that truly need it.
Tap a small amount on under-eye circles, blemishes, or redness, then blend the edges softly so the product fades into your skin.
This keeps your face looking fresh and natural, and it saves you from that heavy, cakey feel nobody invited.
Spot Concealing Techniques
When foundation isn’t part of your routine, spot concealing becomes the quiet hero of the whole look. You can map blemish mapping before you start, so each mark gets a small, careful touch instead of extra product everywhere. Pick a concealer texture that matches your skin’s mood, like cream for dryness or liquid for light coverage. Then tap just on redness, darkness, or a stubborn spot, and let the rest of your skin stay visible.
- Use a tiny brush or fingertip for control.
- Choose hydrating formulas that look like skin.
- Build only whenever the spot still shows.
This keeps your face balanced and real, so you still feel like yourself, just a little more polished and welcomed in your own glow.
Blend Edges Seamlessly
How do you keep concealer from shouting instead of blending in? Start by dotting it only on the spots that need help, then tap the edges with your ring finger or a small sponge. You want seamless blending, not a mask.
Work in thin layers so you can build coverage without losing your natural skin. If the spot sits near bare skin, soften the border first, then press the center a little more. That gives you a soft edge transition and keeps the finish looking like you belong in your own face, not like you borrowed someone else’s.
A tiny bit of moisturizer on dry spots can help too. When you blend with patience, your skin still looks like skin, just a little more even and calm.
Even Out Tone With Cream Bronzer and Blush
Cream bronzer and blush can do a lot of quiet work for a foundation-free look, especially when your skin already feels well prepped. You can use cream bronzer to soften redness and add warmth where your face naturally catches light.
Then, let blush placement guide the shape of your look so you feel balanced, not masked.
- Sweep bronzer along temples and cheeks.
- Tap blush on the outer cheek.
- Keep edges soft with clean fingers.
This mix helps you look rested and pulled together without hiding your skin. Because the formulas stay creamy, they move with you and feel friendly on the face. Should you’ve ever wanted makeup that says, “Yep, I belong here too,” this step gets you close.
Blend Blush for a Brighter Look
A little blush can wake up your whole face, especially after bronzer has already added warmth and shape. You don’t need much. Smile softly, then tap color onto the highest part of your cheeks and blend it slightly upward. That bright blush placement helps your skin look lively, not painted.
For a softer finish, use cream blush and press it in with clean fingers or a small brush. You want diffused cheek color that melts into your skin and keeps the look natural. Should the shade feels strong, build it slowly. A light hand helps you fit in with the fresh, effortless makeup crowd, and that’s always a good place to be. Keep the edges soft, and let the color look like it belongs there.
Highlight to Add Dimension
Once your blush is in place, a touch of highlight can bring the whole look to life without making your skin look coated. You don’t need much to feel polished and part of the moment.
Use highlight placement on the high points where light naturally hits. That gives you strategic radiance, not shine overload.
- Tap a small amount on the tops of your cheekbones.
- Add a little to the inner corners of your eyes.
- Sweep a thin line down the bridge of your nose.
Keep the rest soft so your skin still looks like skin. A creamy or balmy formula blends in fast and feels friendly, not fussy.
Once you place it with care, you lift your features and keep your face looking fresh, warm, and easy to wear.
Set Foundation-Free Makeup Without Caking
To keep foundation-free makeup looking smooth, you need to set it with a light hand, not a heavy one. Use a soft brush to dust powder only where you get shine, like the T-zone and outer face. That featherlight setting helps your skin look alive, not sealed.
Should you press too much product, you’ll see minimal caking fast, and nobody wants that crusty surprise. Keep the rest of your face bare so your blush and glow stay fresh. Then use a small amount of BB powder or translucent powder and tap, don’t sweep. This keeps the finish close to skin while still helping your makeup last.
Whenever you set gently, you protect the natural look and still feel polished, confident, and right at home in your own skin.
Spot Conceal Uneven Areas
You don’t need to cover your whole face to even things out, and that can feel like a relief.
Instead, place concealer only where you see redness, dark spots, or blemishes, then tap the edges so they melt into your skin.
Whenever you blend the borders well, the spot looks softer and the rest of your skin still shines through.
Target Problem Spots
When your skin has a few spots that make you want extra coverage, spot concealing can help without hiding your whole face. You stay in control, and that feels pretty great when you want to look like you belong in your own skin. Use a small brush or fingertip to place product only where you need it.
- Keep your blemish focus tight, so the rest of your skin still shows through.
- Tap concealer on redness zones around the nose, chin, or cheeks.
- Use a thin layer, then check whether the spot still peeks through naturally.
This method helps you match your face, not erase it.
When you work this way, you get calm coverage and keep your look light, real, and easy to wear.
Blend Edges Seamlessly
Soft edges make all the difference, especially whenever you’re spot concealing uneven areas and still want your skin to look like skin. Tap concealer on the center of the spot, then use a clean brush or fingertip to press outward in tiny circles. This seamless border blending keeps the product where you need it and fades the rest into your skin.
Provided the edge still looks sharp, add a little moisturizer to your brush for an edge softening technique that keeps things fresh, not cakey. You can also feather the outer rim with gentle pats, then step back and check it in daylight.
Whenever you soften the border well, you look like you belong in your own skin, not under a mask.
Keep Makeup Without Foundation Fresh All Day
Keeping makeup without foundation fresh all day starts long before the initial swipe of color. You build staying power with clean, moisturized skin, then a light primer that grips without feeling heavy.
After that, use a tinted moisturizer or spot concealer, not a full face layer, so your skin can breathe and still look even.
- Tap on concealer only where you need it.
- Set the T-zone with a whisper of powder.
- Keep all day touch up habits simple: blot, then reblend.
When humidity hits, use humidity proof wear tips like cream blush, small product amounts, and a setting mist. That way, you stay polished with your people, not shiny and stressed.